I don't know about you guys, but our house can get pretty freezing at night. And unless we want to spend $500 a month on heating costs, that's not going to change. Chris and I usually stay warm and toasty under our down comforter (best.invention.ever), but my little man is a...shall we say, ACTIVE sleeper and blankets just do not stay where they're supposed to stay.
Last winter, we were given a couple soft and warm sleep sacks which were awesome, but Cole has since outgrown them. And I thought, since I love my down blanket so much, why not use one for a sleep sack for him as well? I found some sleep sacks online that were down-filled - but they were $130!!! ONE HUNDRED THIRTY DOLLARS! ::gasp::
Hence my motive for making one.
And just in case you might want to make one too, I made a mini-tutorial for you all:
I had a older down-filled throw that I used that worked perfectly for the front and backs of the sack. (If you don't, check thrift stores and Black Friday sales.) I took one of his old sleep sacks to use as a pattern and just traced around it with a thin Sharpie, making it wider and much, much longer. I wanted him to have plenty of room grow big and tall.

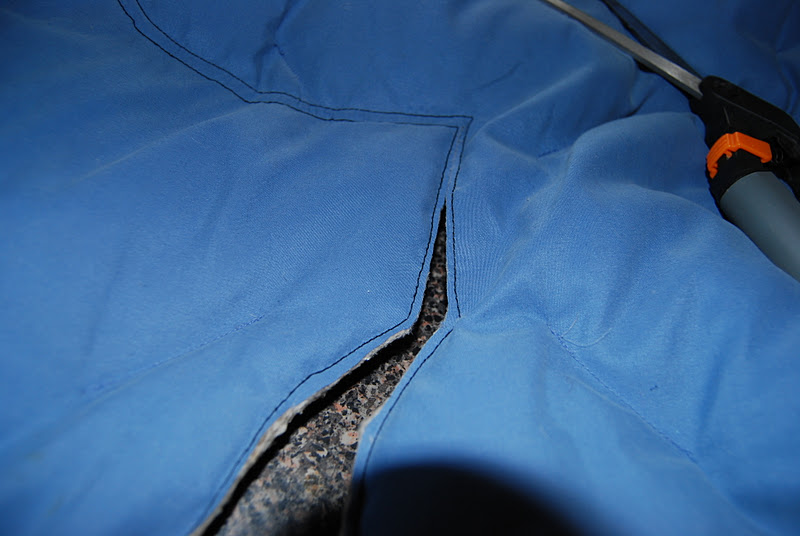
Now, you COULD just stop right there and cut your down blanket right then...if you want an explosion of feathers. In the interest of avoiding a million hours of vacuuming, I stitched with a small stitch along the line I drew, then stitched 1/4 inch along the outside of that line, like this:

Then, when I cut in between the two stitched lines, I had a small explosion of down, instead of a huge explosion.

I traced the same pattern again on the second half of my blanket, but cut the neck a little deeper scoop since it would be the front. I also stitched a line down the middle, to be used for snaps to close the sleeper up.
Next, I decided I wanted to use some ultra-soft fabric (not sure what it's called...it's a super soft polyster mix from JoAnn's) as an extra top layer. I traced the top of the down blanket onto the soft fabric, allowing for the front snap seams.


Then, I put the back down blanket layer, the soft fabric layer, and the top down layer and pinned all around the edges, making sure to not pin the arm holes or the neck hole. I stitched all around:

After I flipped in right side out, I used simple store-bought binding for the arm holes and neck hole, then hand-stitched on the snaps...and voila! A warm and snuggly sleep sack for WAYYYY less than $130!


No comments:
Post a Comment